WP ERP Pro’s AI Recruitment engine reads resumes, scores candidates, and generates job requirements. This guide covers the global AI settings and per-job scoring setup.
Global AI Settings
Go to WP Admin Dashboard → WP ERP → Settings → HR → Recruitment → AI Settings.
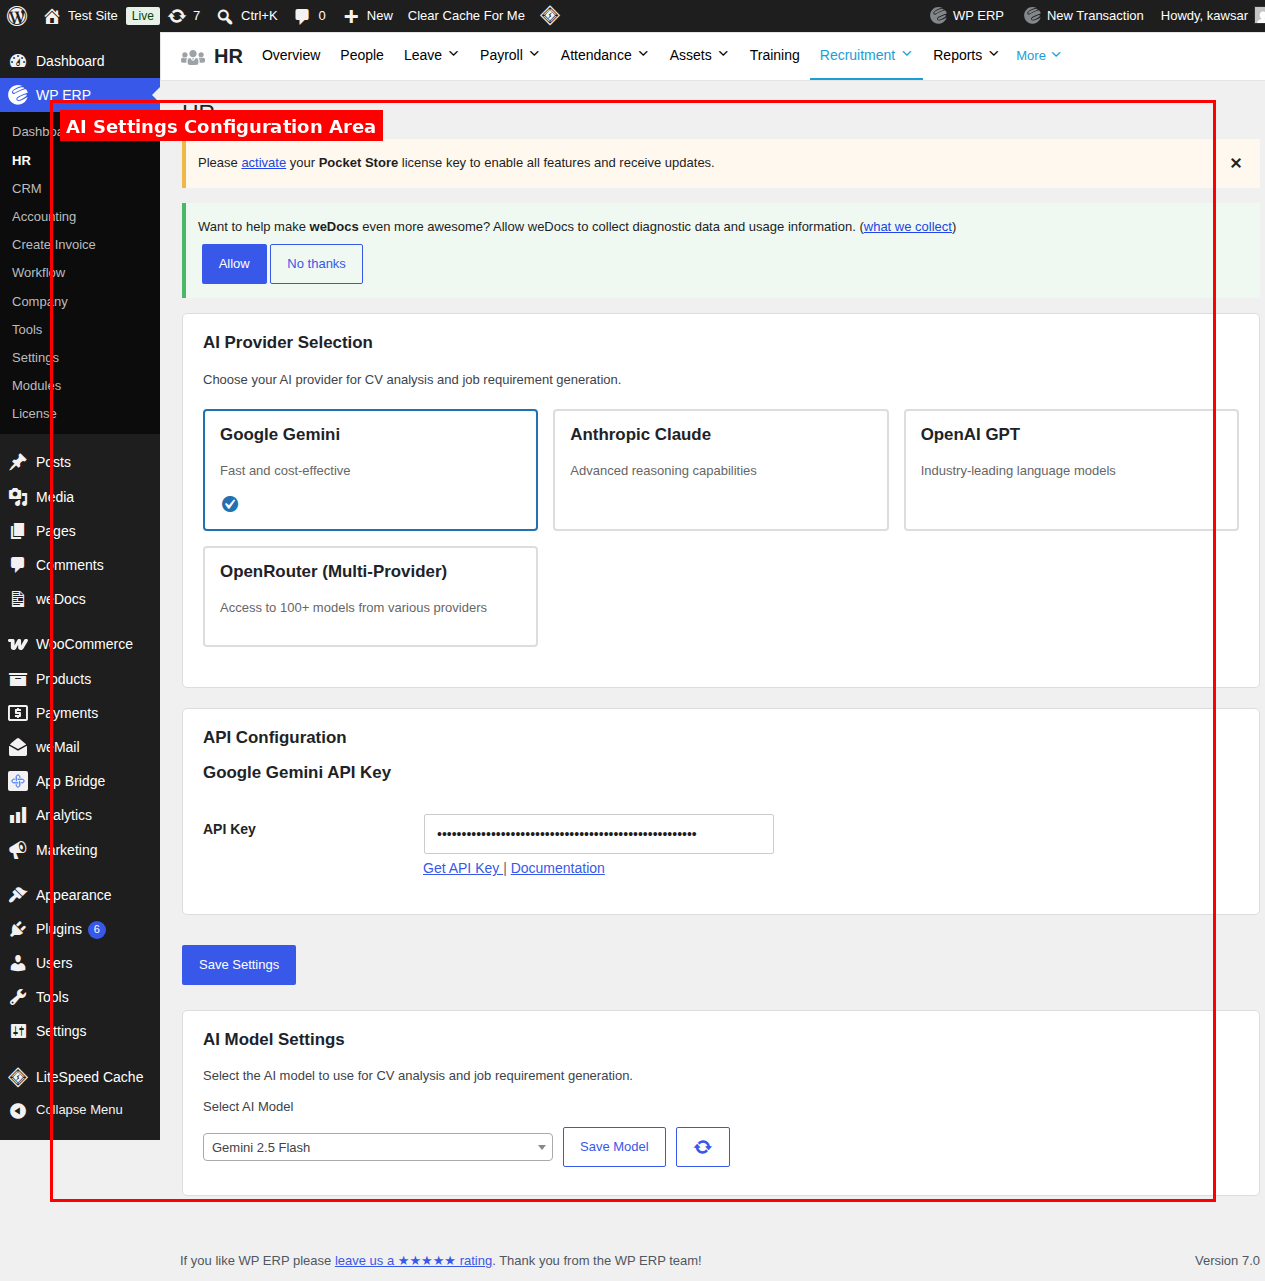
Only administrators, or roles with HR settings permission, can see this menu. If AI Settings is missing, ask your site administrator for access.
AI Provider
Pick a provider card: Google Gemini, Anthropic Claude, OpenAI GPT, or OpenRouter (Multi-Provider). Your choice saves automatically, and the API Key field below updates to match. Switching providers clears the saved AI Model — pick and save a model again after switching.
API Key
Paste your key into the field for your provider. Click the eye icon to show or hide it. Click Save Settings to save the key — leaving the page without saving discards it. Keys shorter than 10 characters are rejected.
Click Test Connection to check the key works. You’ll see a success or error message.
AI Model
The model dropdown lists models available for your provider and saved key. Pick one and click Save Model to save it right away; a short model description appears below.
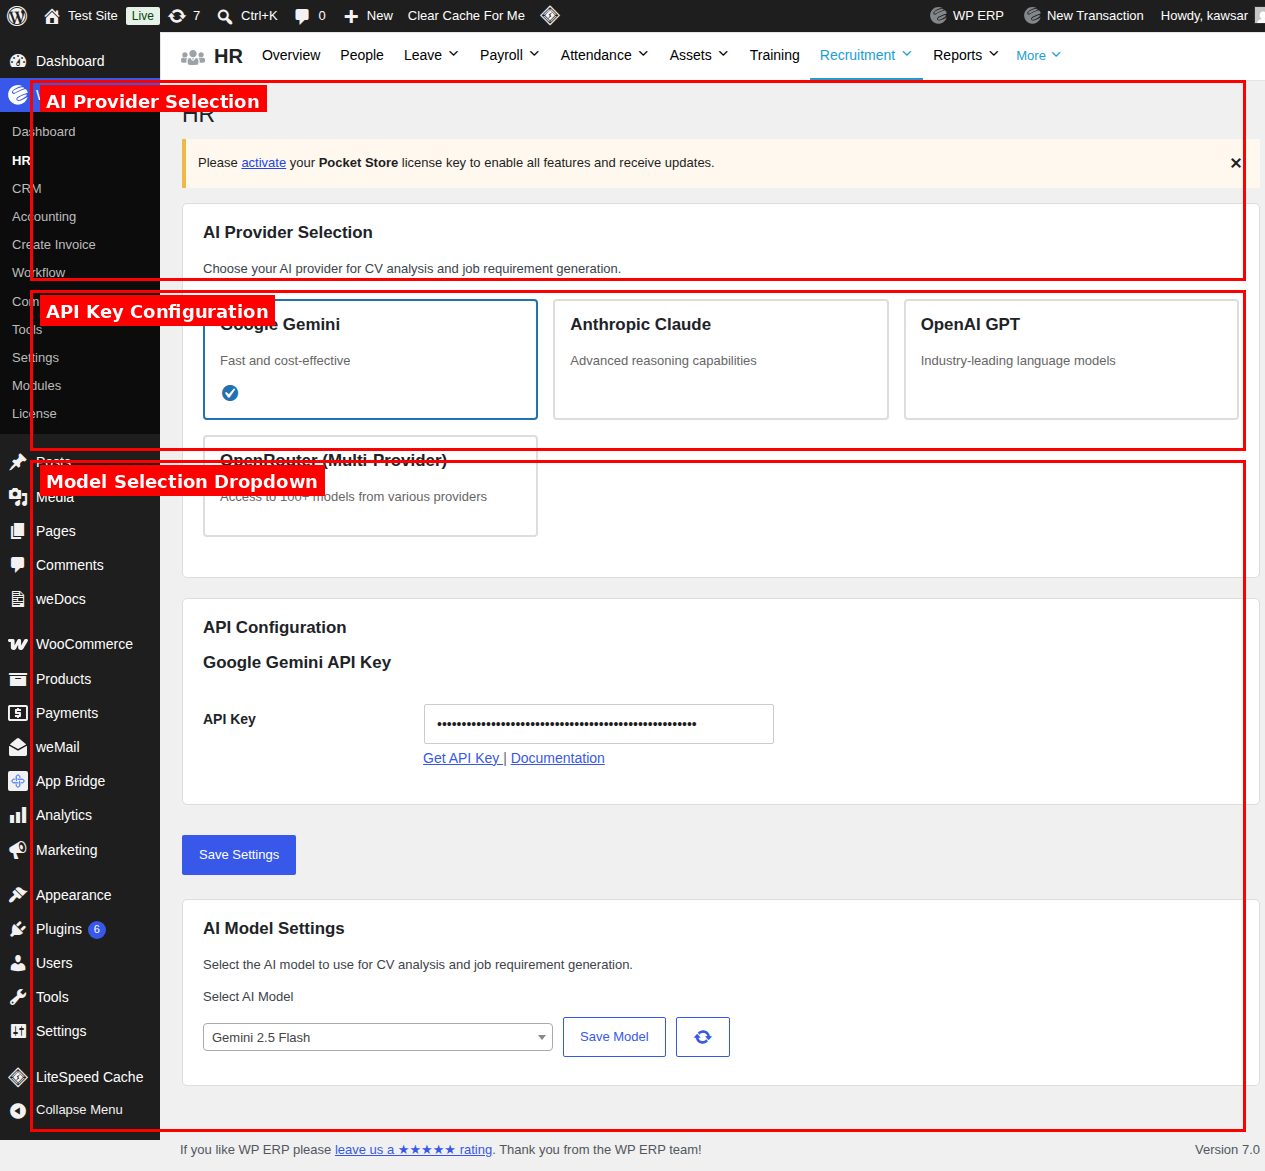
The model list is cached for 24 hours, so new models from the provider won’t show up until the cache clears. Click Refresh to pull the latest list. Switching provider cards doesn’t refresh the dropdown automatically — save your settings or click Refresh first.
AI CV Analysis and Auto-Processing
Enable AI CV Analysis is the master switch. Turn it on and save to show AI columns (Match Score, AI status) across Recruitment screens. Turn it off to hide those columns and stop sending resumes to the AI provider.
Auto-Process Applications, when on, sends new resumes for AI analysis automatically. When off, resumes are stored but wait for an admin to click Process CV or Reprocess.
Set Up an API Key and Model
- Go to WP Admin Dashboard → WP ERP → Settings → HR → Recruitment → AI Settings.
- Click a provider card, for example Anthropic Claude.
- Paste your API key. Click the eye icon to check it.
- Click Test Connection.
- Once the test passes, pick a model from the AI Model dropdown and click Save Model.
- If your model isn’t listed, click Refresh, then pick again.
- Click Save Settings.
Per-Job AI Settings
Global settings pick the AI provider. Each job opening needs its own requirements and scoring rules.
Go to WP Admin Dashboard → WP ERP → HR → Recruitment → AI Job Settings to see a list of published jobs, with an AI Candidate Processing toggle and Edit Settings / Generate actions for each.
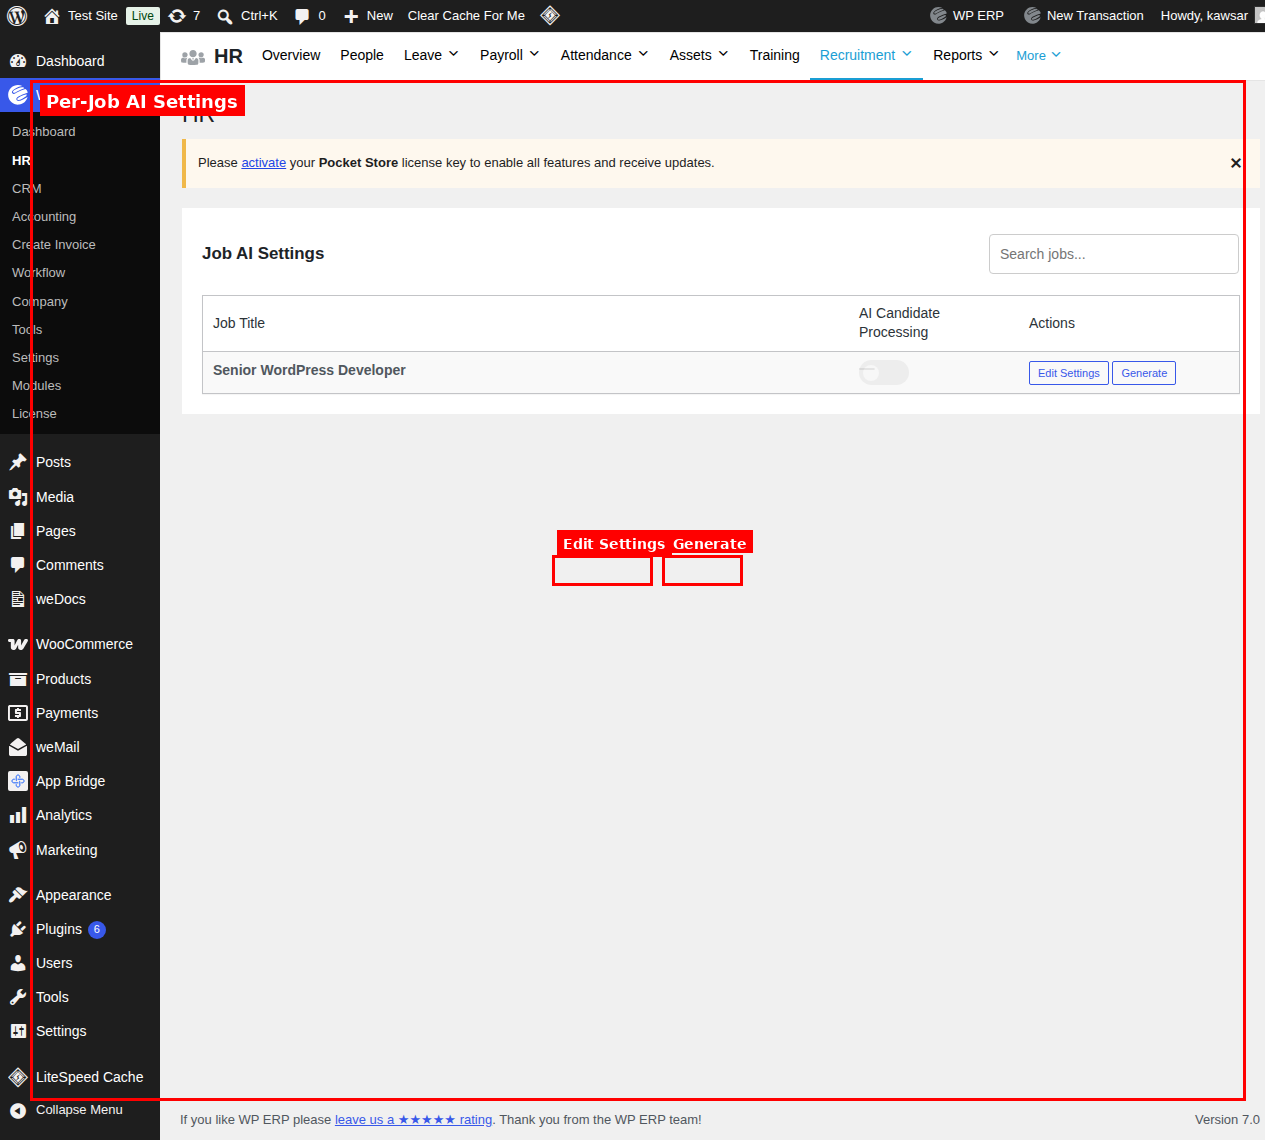
The AI Candidate Processing toggle won’t stay on until the job has saved requirements. Click Edit Settings, fill in at least Category Detected and Core Skills, save, then try the toggle again.
Click Generate to have the AI detect category, core skills, secondary skills, tools, and certifications from the job description. The job must be published and have a description. Review the generated fields, then click save — they aren’t saved automatically.
Requirements Form
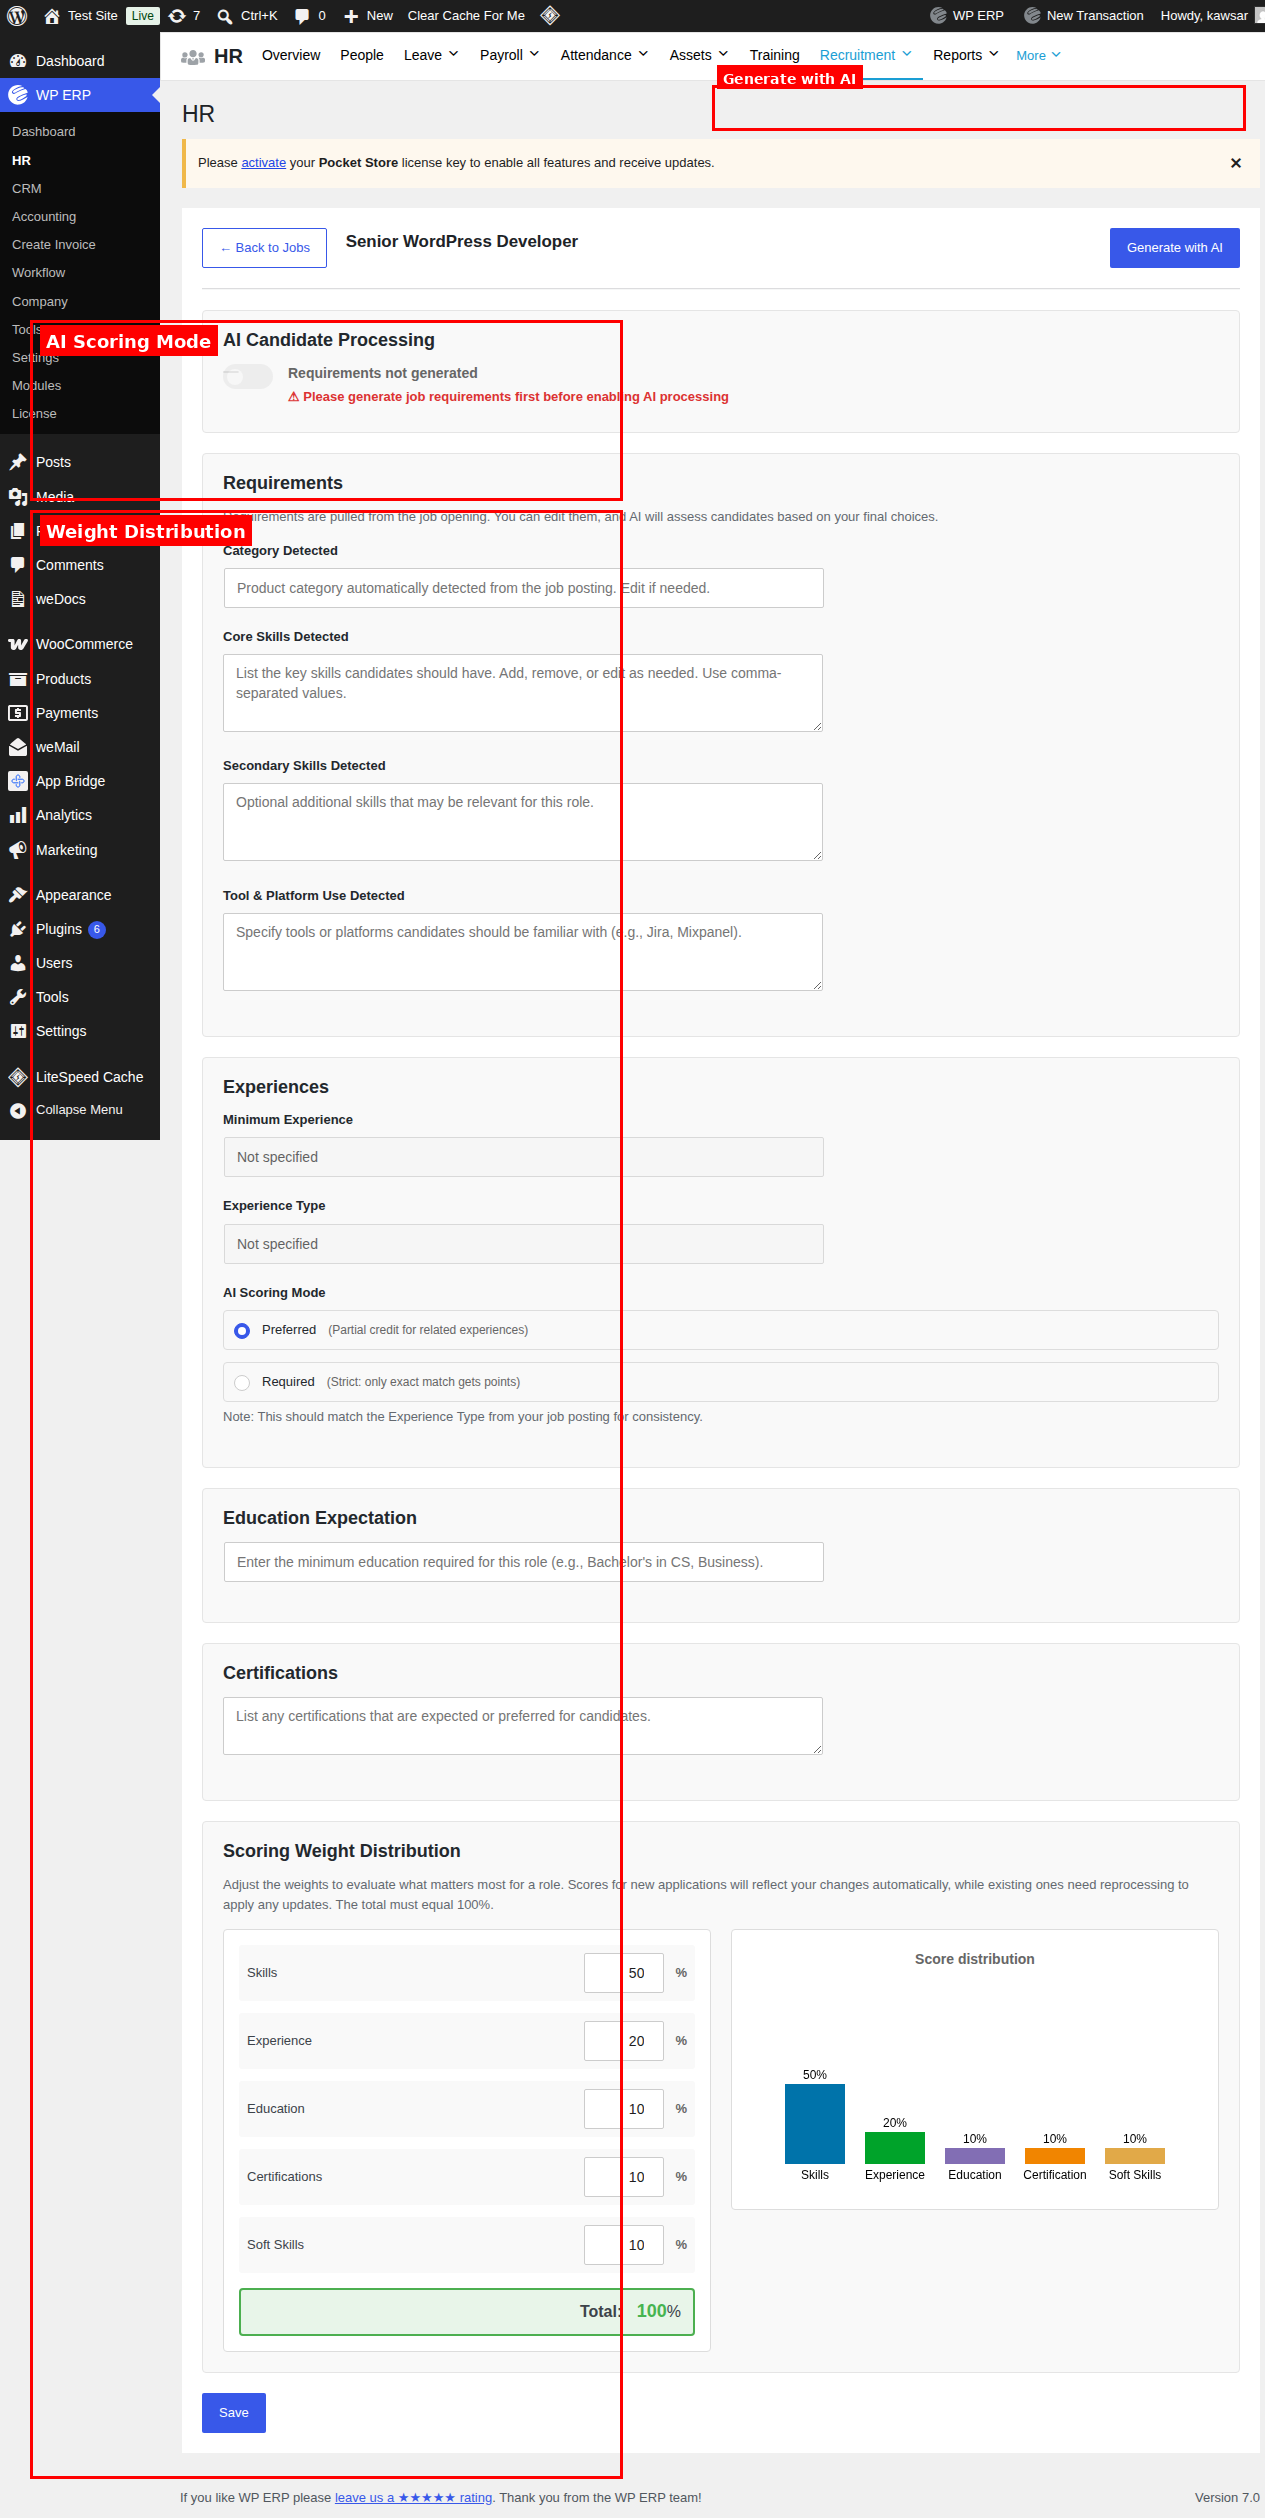
- Category Detected: the type of role, for example “Frontend Development”.
- Core Skills Detected: comma-separated must-have skills.
- Secondary Skills Detected: comma-separated nice-to-have skills.
- Tool & Platform Use Detected: comma-separated tools or platforms.
- Minimum Experience and Experience Type: read-only, pulled from the job post. Edit the job post to change these.
- AI Scoring Mode: choose Preferred (Loose Match) to give partial credit for related experience, or Required (Hard Match) to only award points for directly matching experience. Use Required when the role needs direct background in that field; use Preferred when candidates can grow into the role from an adjacent one.
- Education Expectation: the expected degree or qualification level.
- Certifications: any certifications you want candidates to hold.
Scoring Weights
Set a percentage for Skills, Experience, Education, Certifications, and Soft Skills. The total must equal exactly 100 — the counter turns red until it does. Click save once it’s green.
Troubleshooting
- Toggle won’t stay on: save the job’s requirements first (Category Detected and Core Skills).
- Weights won’t save: the five fields must total exactly 100.
- Generate returns nothing: the job must be published and have a description.
- Test Connection fails: check the key for typos or extra spaces, confirm it hasn’t expired, and confirm it matches the selected provider.
- New models missing: the model list is cached for 24 hours — click Refresh.
- Nothing processing automatically: check that Auto-Process Applications is on; otherwise resumes need a manual Process CV or Reprocess click.
Still stuck? How can we help?